

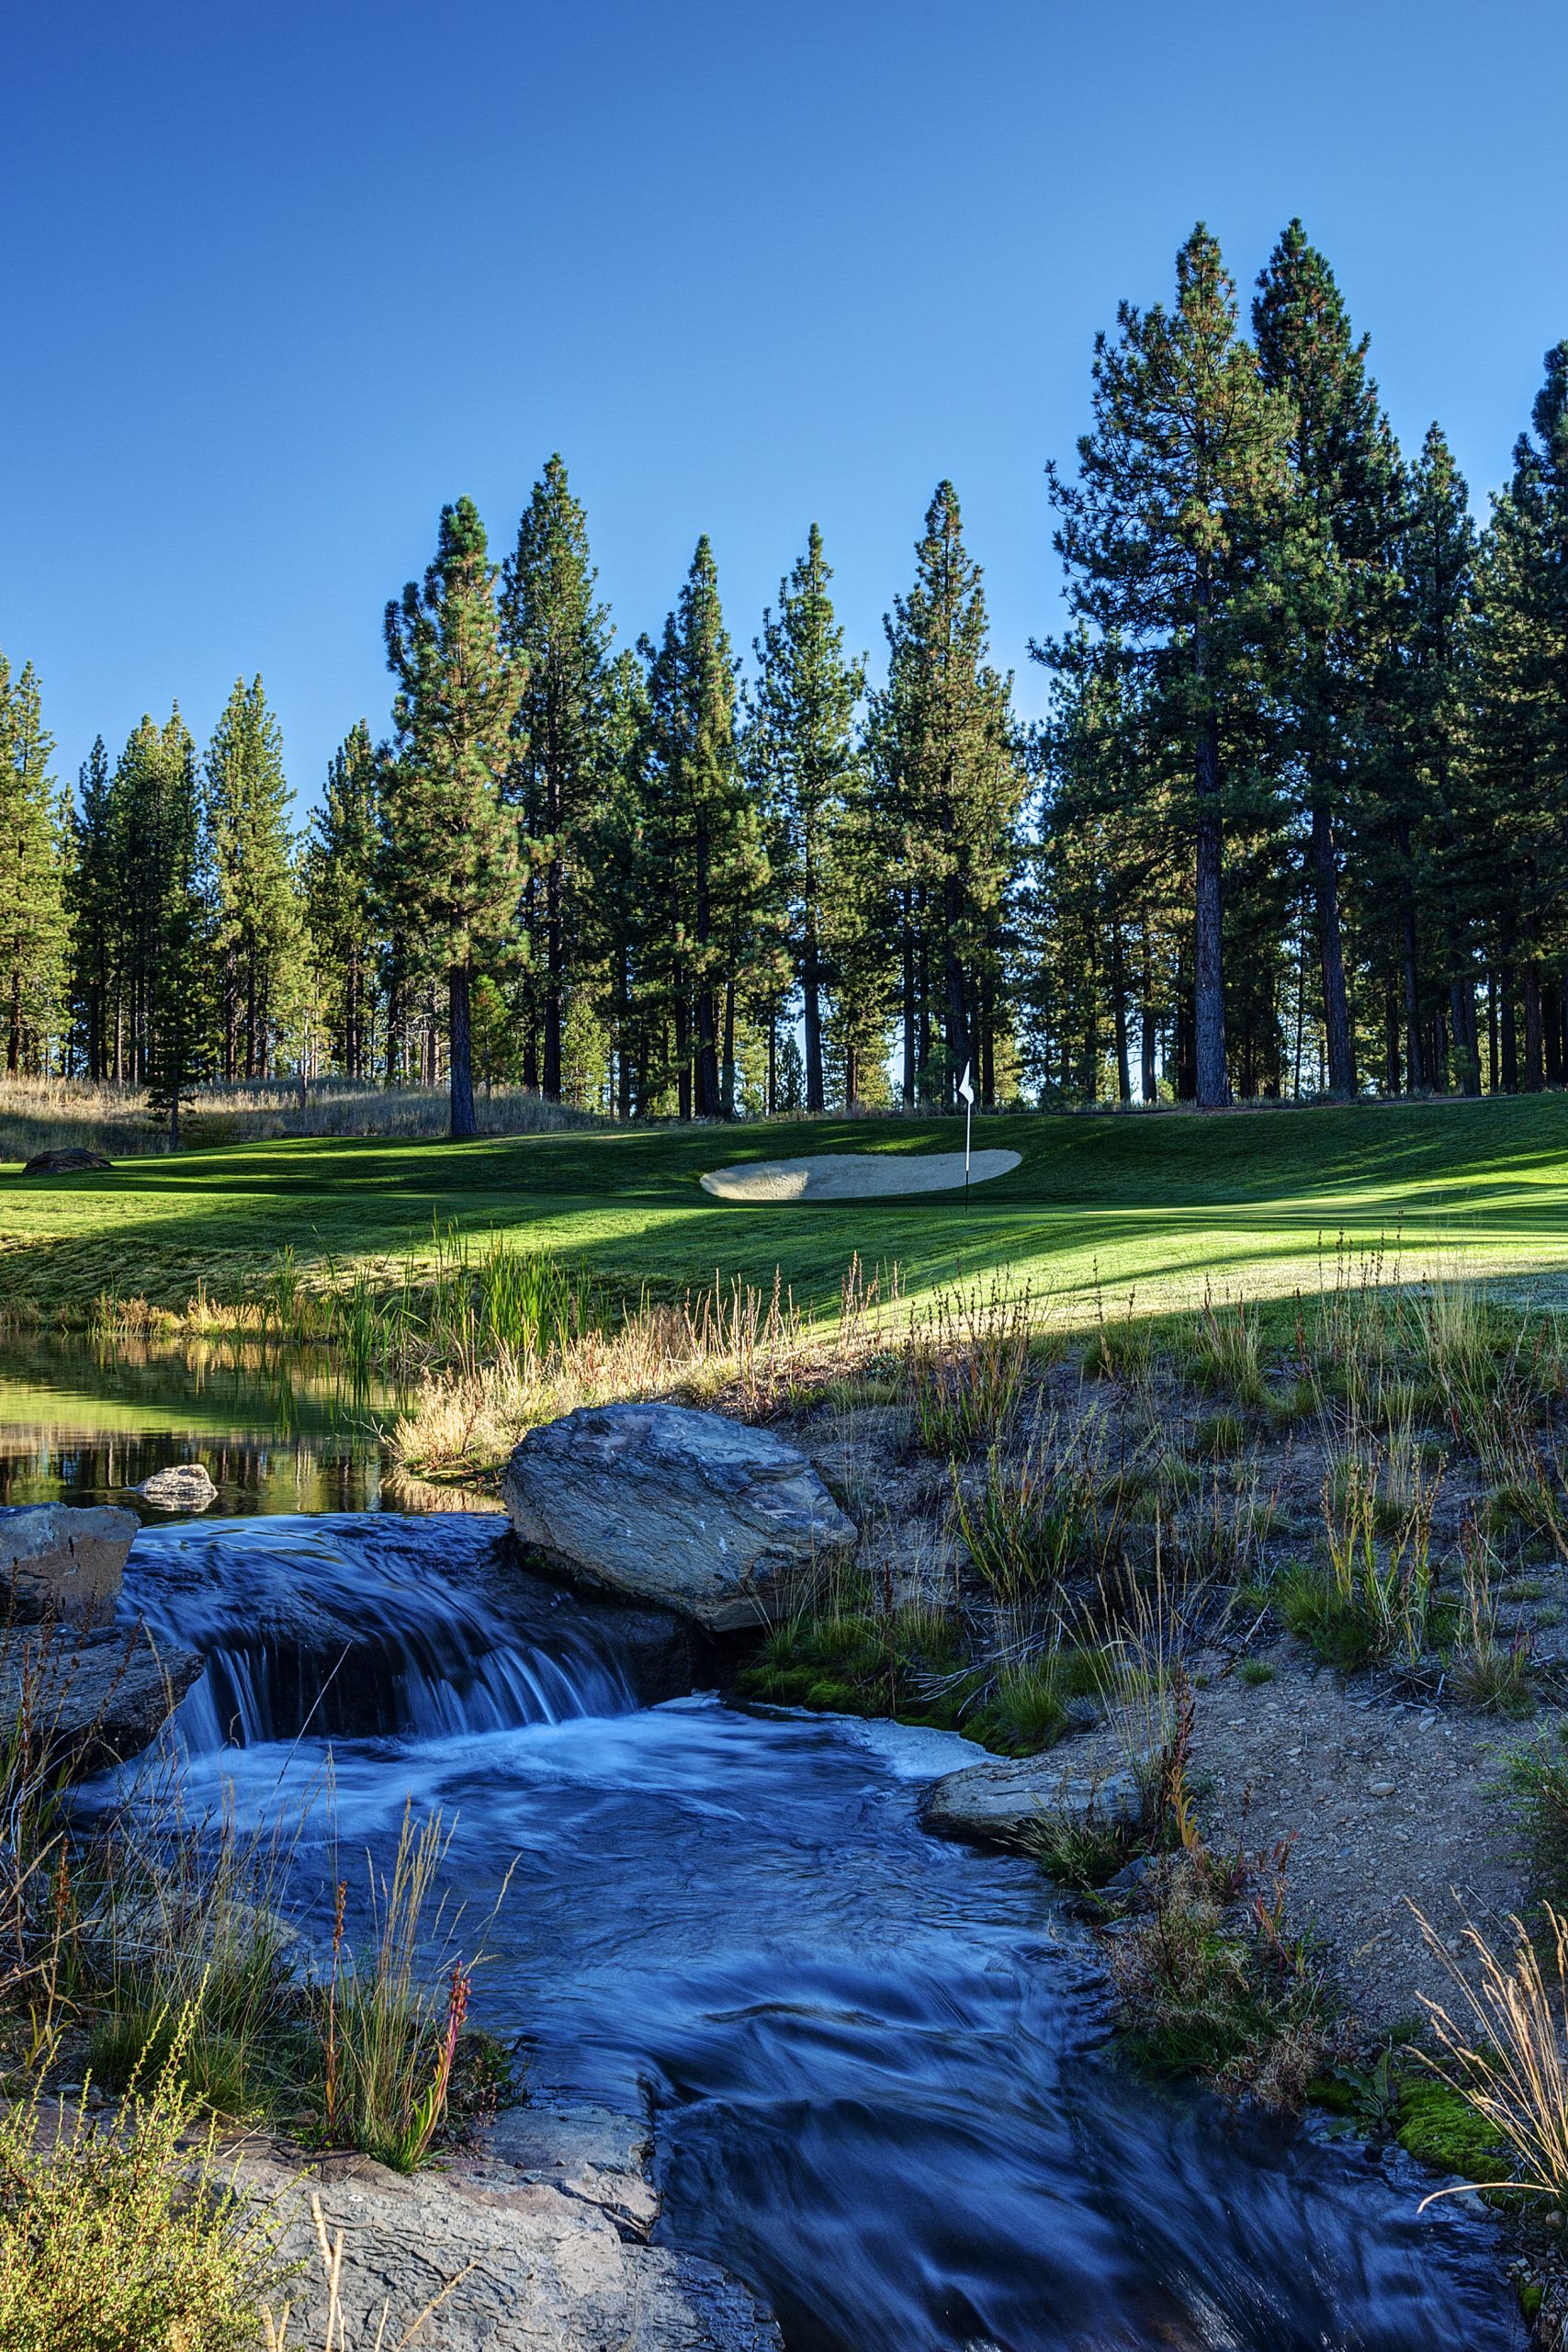
Tucked away in a beautiful mountain meadow in the shadows of Mt. Rose, Gray's Crossing embraces the surrounding landscape. Designed by Peter Jacobsen.
Tucked away in a beautiful mountain meadow in the shadows of Mt. Rose, Gray's Crossing embraces the surrounding landscape. Designed by Peter Jacobsen.
Stay & Play
THE COTTAGES
Experience the amenities of resort-style living with the comfort of being in a private home. The Cottages at Old Greenwood bring together quiet neighborhood charm, private club access, and course-side views, all nestled among the towering pines of Old Greenwood’s PGA TOUR golf course. Guests staying at The Cottages receive our lowest publicly available golf rates.
COURSE DETAIL
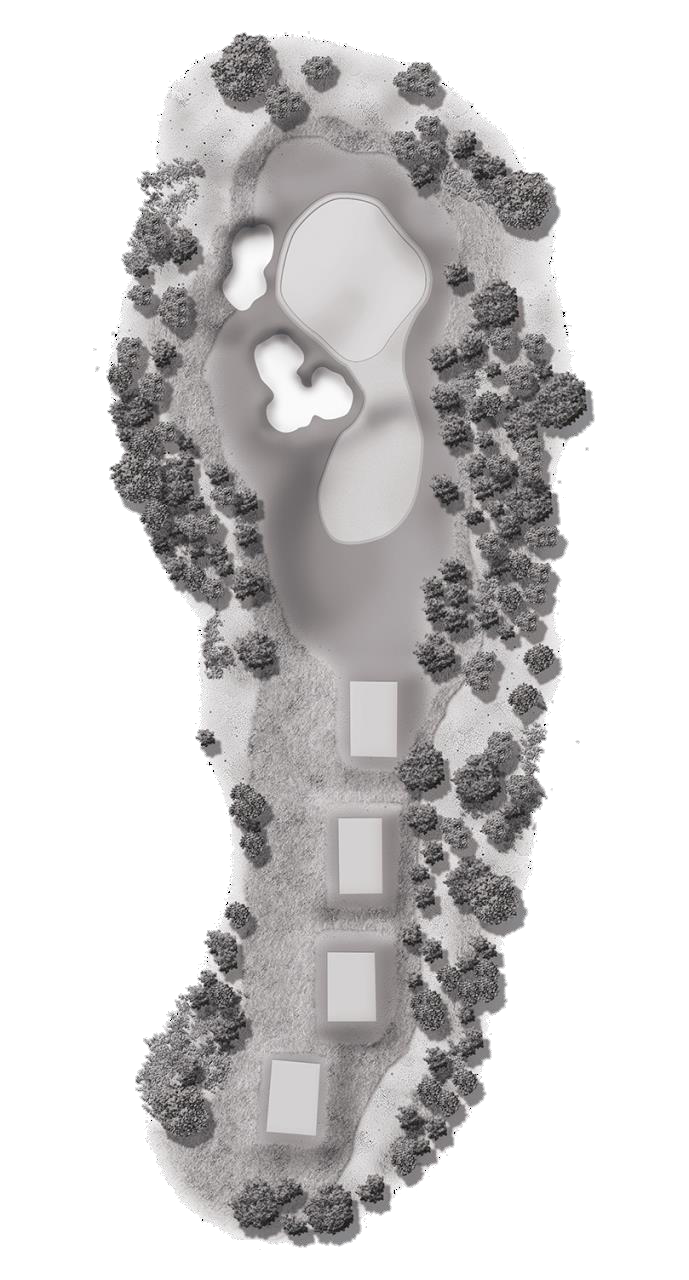
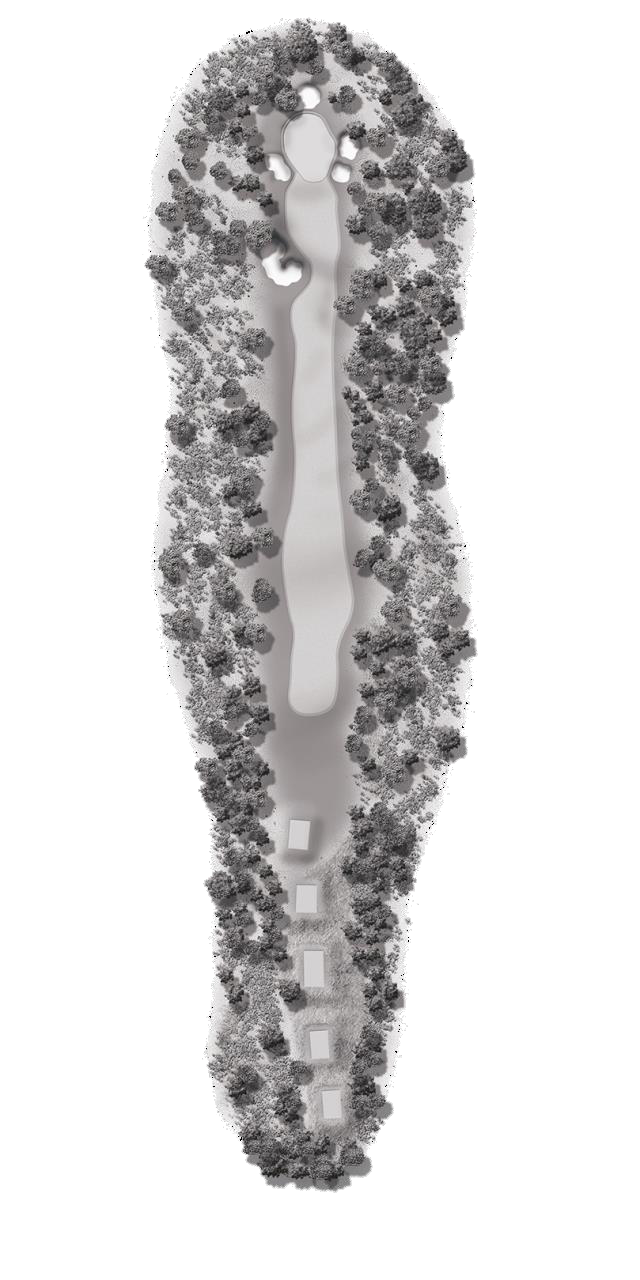
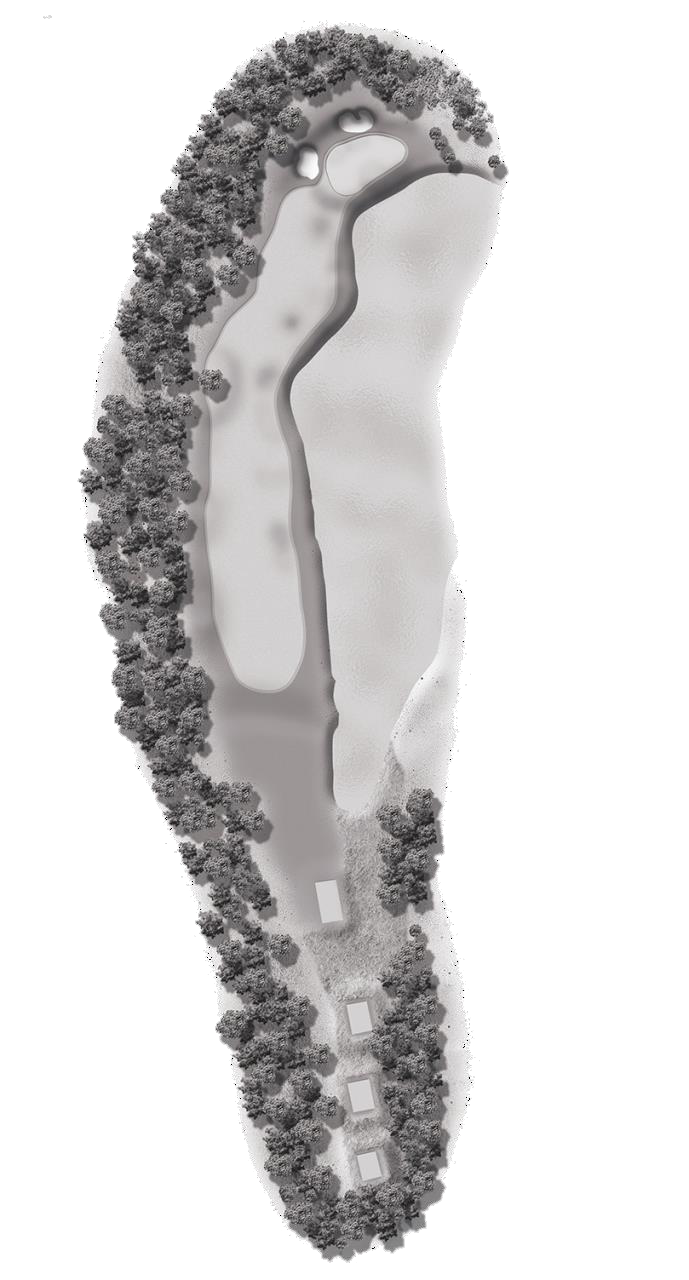
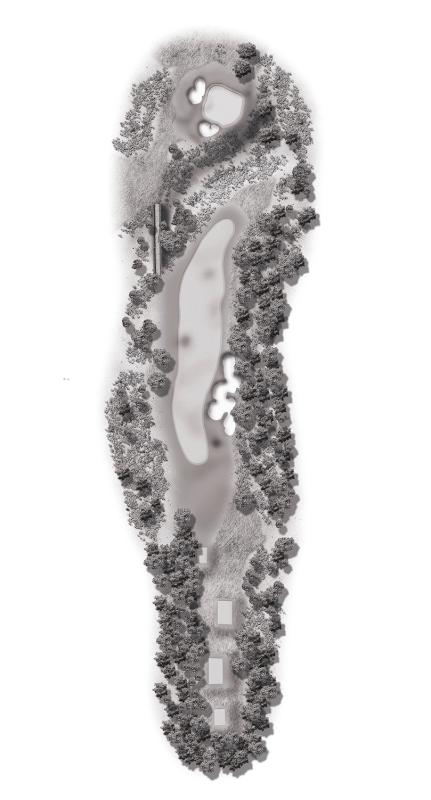
Playing predominately into the prevailing wind, this tee shot needs to favor the left side of the fairway on this opening par four. The long hitters may be able to get around the corner, but most players will be hitting a medium-iron second shot to a green protected by bunkers on the right.
Hole #1
P A R: 4
H A N D I C A P: 13/11
![]() 444
444
![]() 410
410
![]() 375
375
![]() 335
335
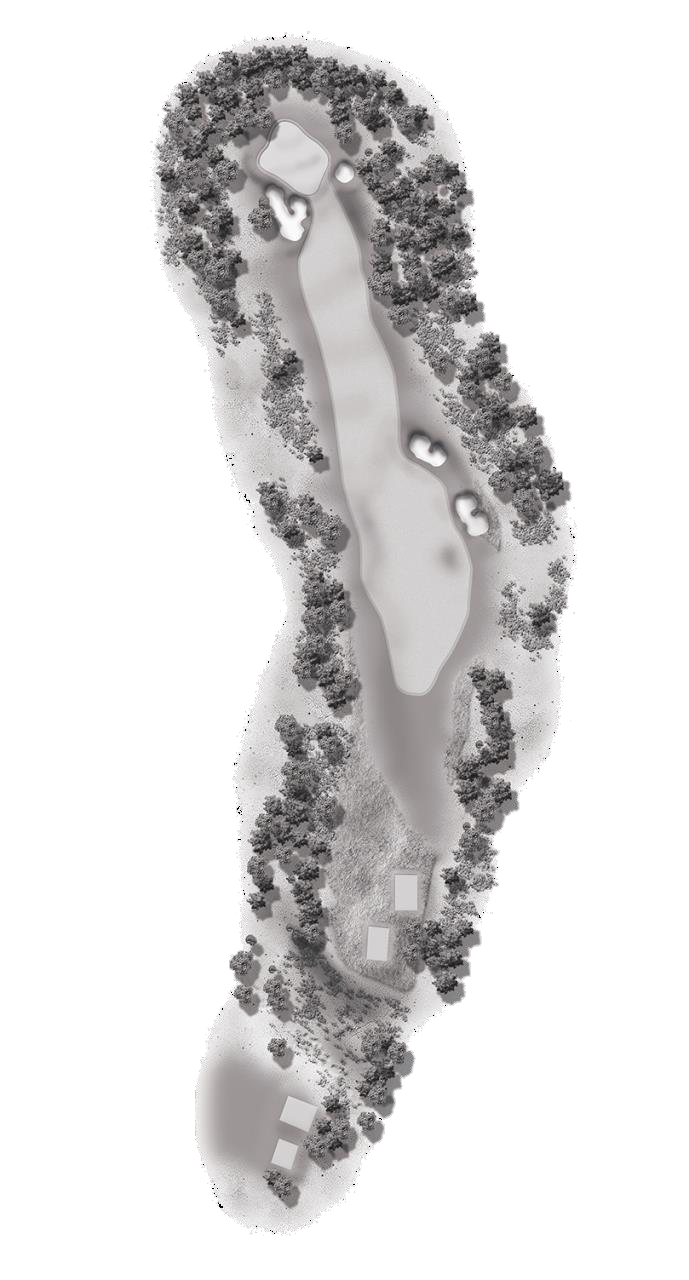
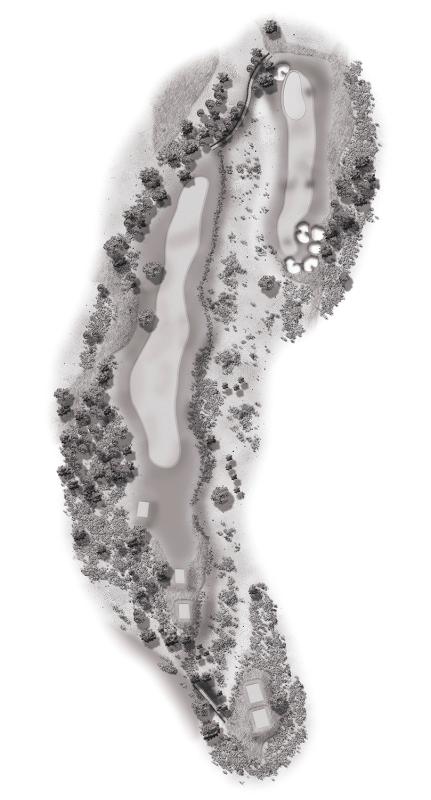
Choose a club off the tee that will keep you short of the left fairway bunker. The approach will leave you with a short to mid-iron to a green sloping right with bunkers on the left.
Hole #2
P A R: 4
H A N D I C A P: 11/13
![]() 380
380
![]() 348
348
![]() 307
307
![]() 272
272
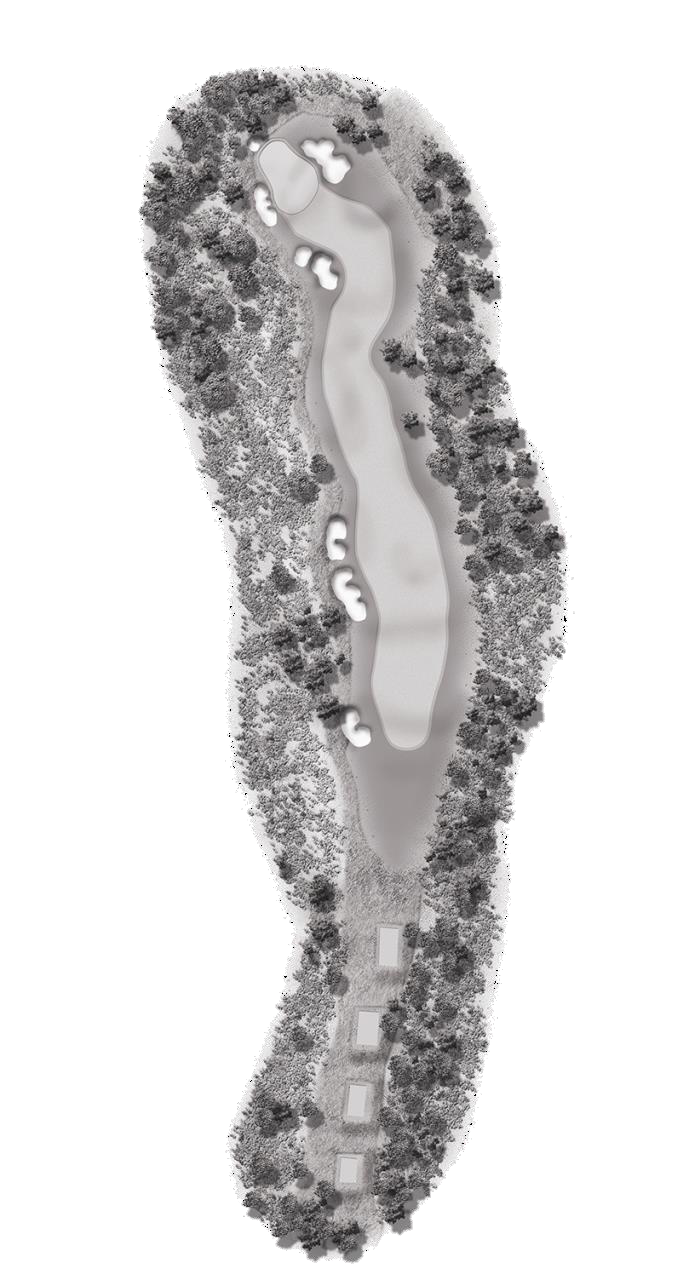
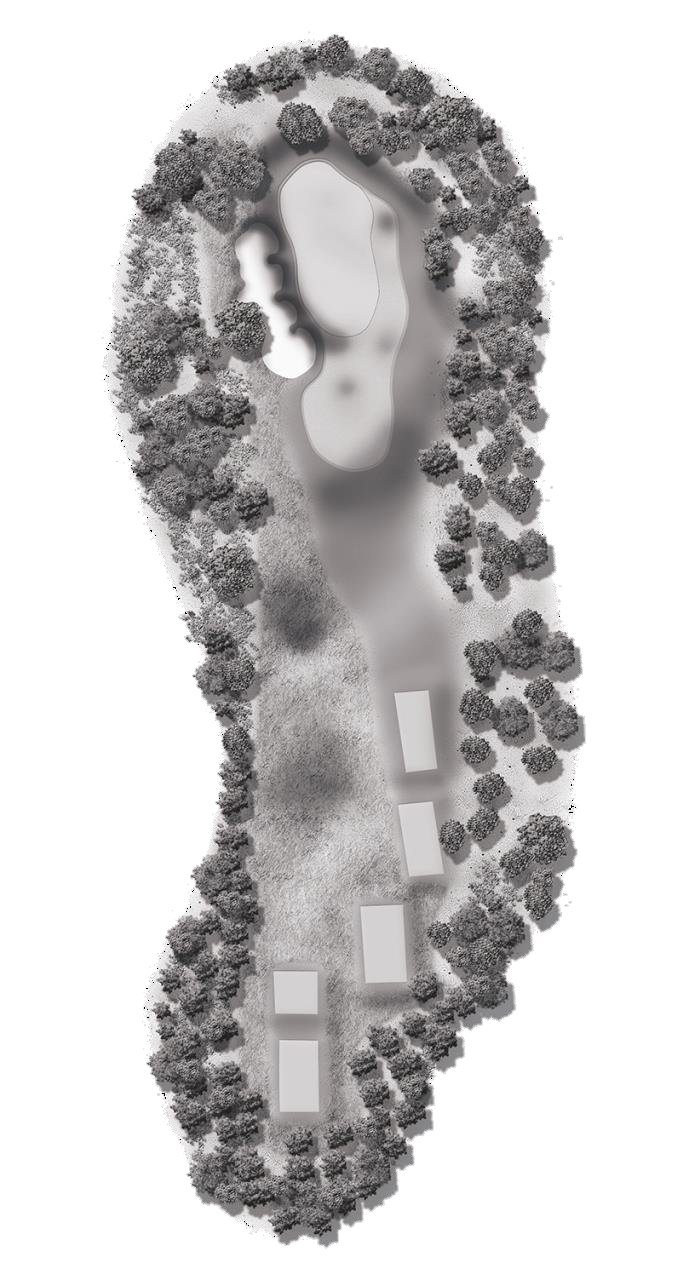
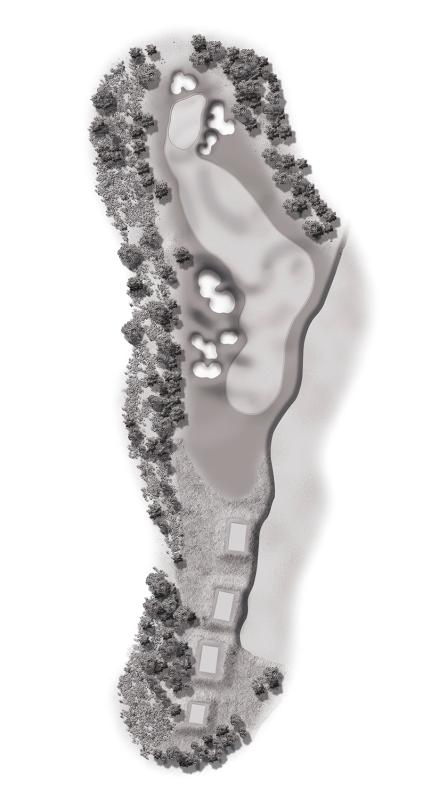
With the prevailing wind at your back tee it high and let it fly. Tee shot needs to favor the left side of the fairway on this long par five and the long hitters may be tempted to go for it in two. Most players will be hitting a medium-iron second shot avoiding the bunkers on the left, setting up a short wedge to this well protected green. If you go for it in two aim over the last fairway bunker and watch your ball feed to the right as it runs up onto the green.
Hole #3
P A R: 5
H A N D I C A P: 7/5
![]() 641
641
![]() 604
604
![]() 563
563
![]() 452
452
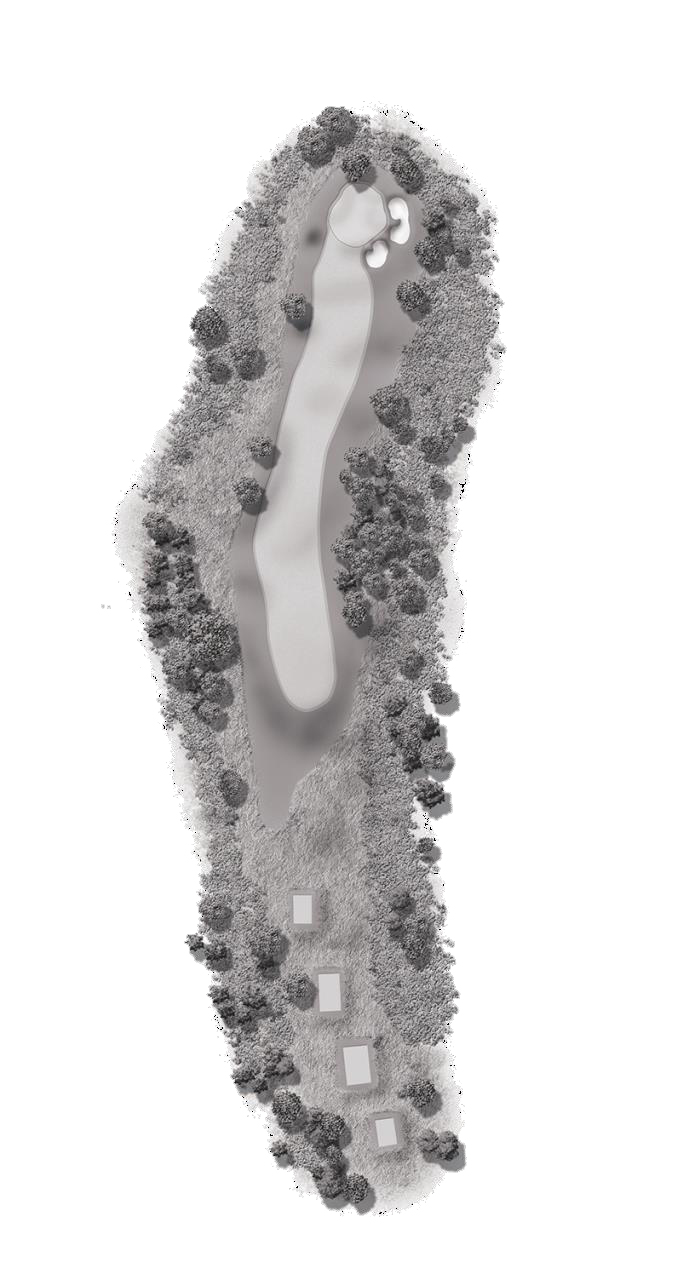
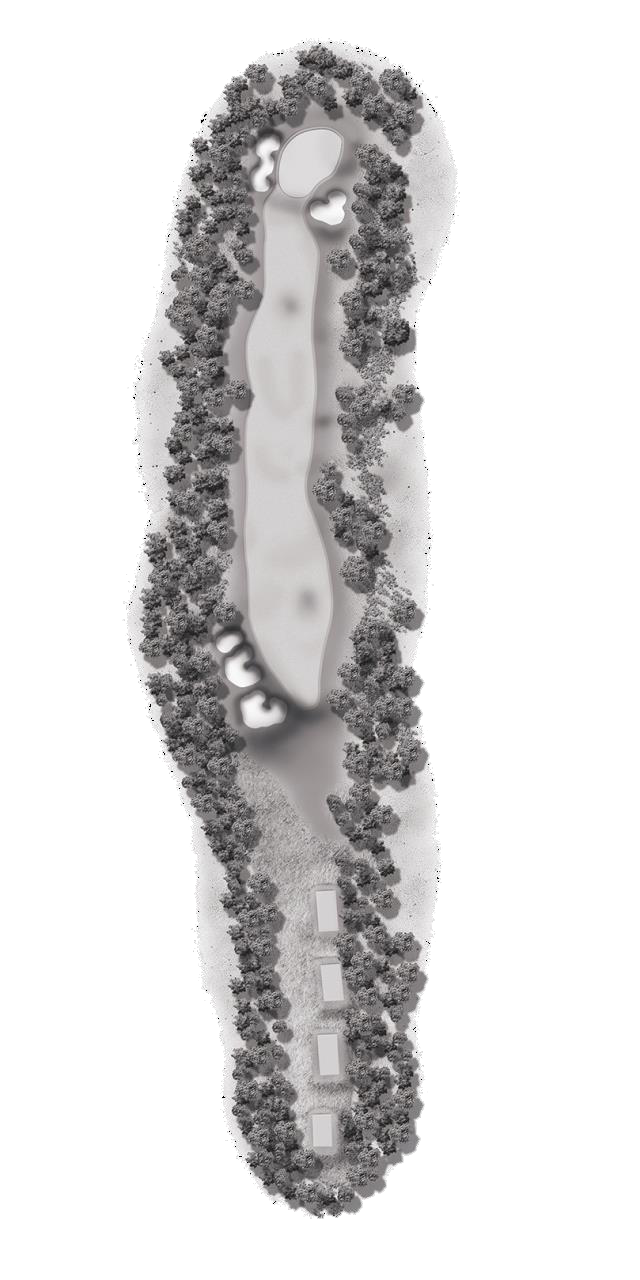
Although this is the shortest hole on the course, it demands a precise shot. You should be into the prevailing wind even though you might not feel it on the tee. Favor the right side when in doubt, walking away with a par is a good score on this hole.
Hole #4
P A R: 3
H A N D I C A P: 15/15
![]() 164
164
![]() 156
156
![]() 138
138
![]() 87
87
A safe play will favor the right side, while a more aggressive player will take aim at the tall pine tree in the distance hoping to catch the down slope for an extra twenty yards. Downhill and downwind the approach plays shorter than the yardage given. Play it safe to the front of the green because long is not an option.
Hole #5
P A R: 4
H A N D I C A P: 3/3
![]() 492
492
![]() 457
457
![]() 421
421
![]() 381
381
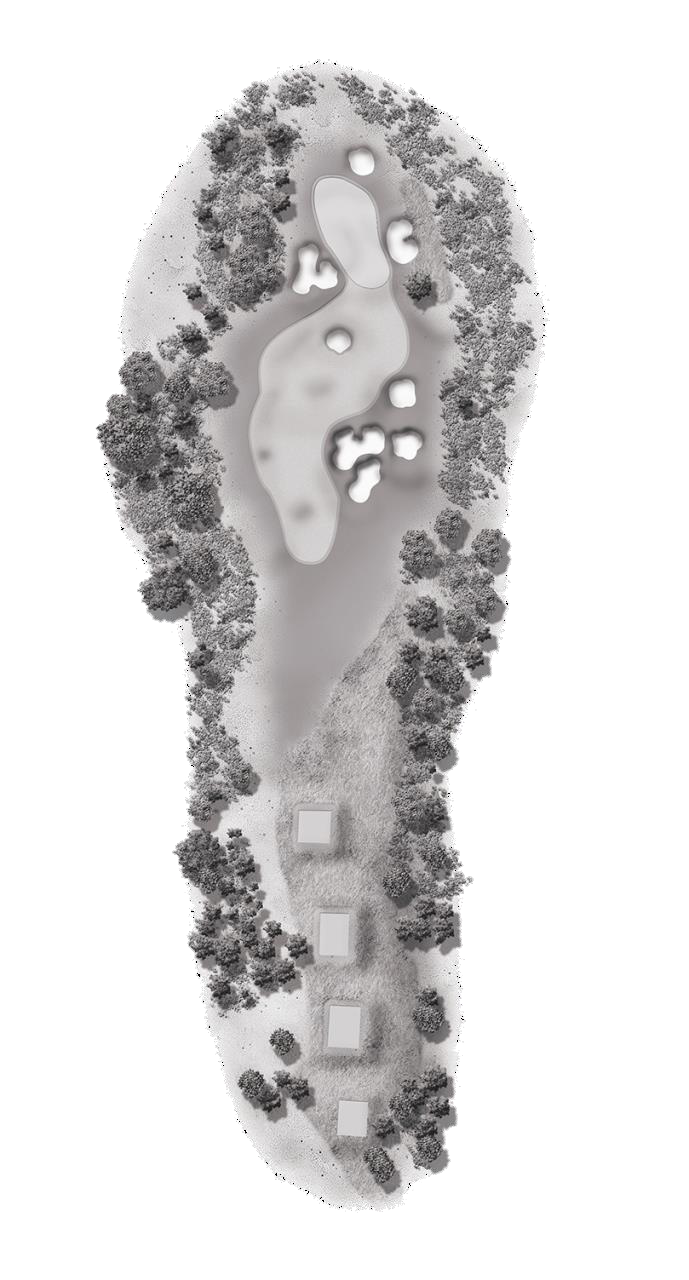
This reachable par four is a classic risk reward hole. Carry the bunkers on the right and you may find yourself with a put for eagle. This green is severely sloped from front to back and right to left.
Hole #6
P A R: 4
H A N D I C A P: 17/17
![]() 304
304
![]() 274
274
![]() 242
242
![]() 206
206
We have another long par 5 playing downwind where long hitters can attack in two. The ideal tee shot and second shot will favor the left side as this entire hole slopes left to right. For those who laid up, precision is necessary to this shallow well protected green
Hole #7
P A R: 5
H A N D I C A P: 5/7
![]() 624
624
![]() 591
591
![]() 557
557
![]() 452
452
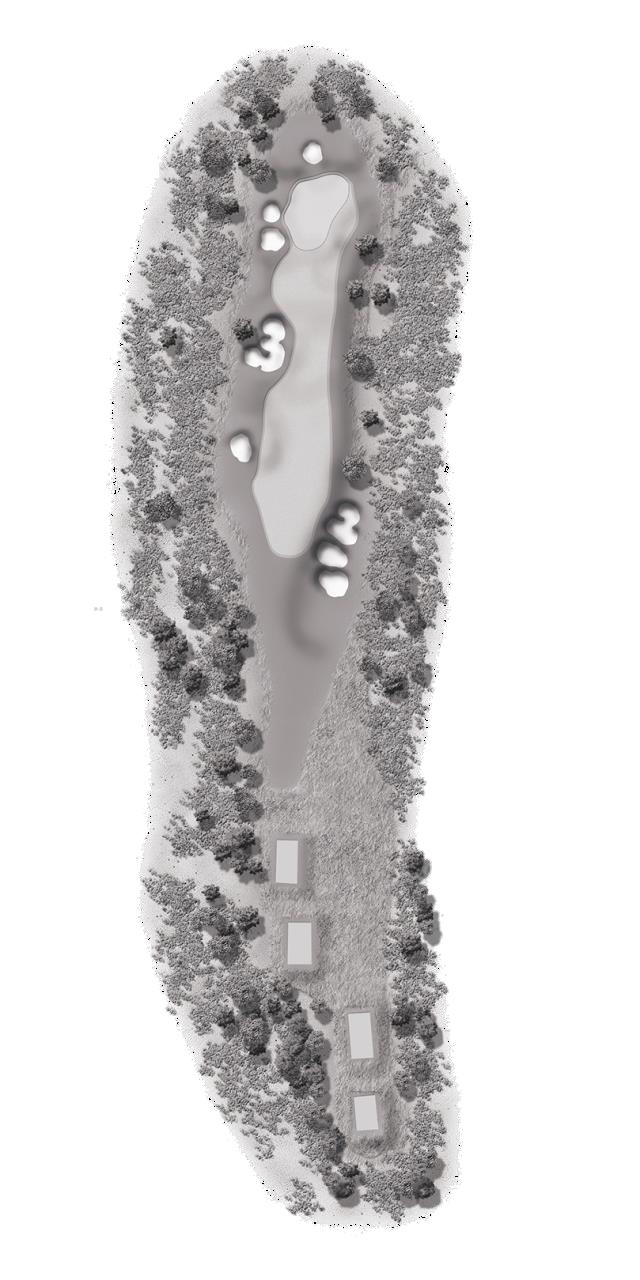
Elevated tee with wind quartering down right to left this par three will play shorter than the yardage. This green is protected by two bunkers on the right and a pond on the left, par is a good score.
Hole #8
P A R: 3
H A N D I C A P: 9/9
![]() 185
185
![]() 178
178
![]() 158
158
![]() 127
127

Playing back into the wind, a tee shot down the right hand side will get a left bounce to the center of the fairway. Take enough club on this uphill approach, but be careful not to over club, as the green is severely sloped from back to front. Par is a great score to finish your outward nine.
Hole #9
P A R: 4
H A N D I C A P: 1/1
![]() 474
474
![]() 444
444
![]() 406
406
![]() 339
339
A tee shot between the bunkers on the right hand side will put you in good position for the approach. Second shot with the prevailing wind will play shorter. Be aware of hole location as this is one of the tougher greens on the course.
Hole #10
P A R: 4
H A N D I C A P: 8/14
![]() 474
474
![]() 455
455
![]() 348
348
![]() 321
321
An accurate approach to this medium length par three will be necessary as the green is deep and narrow. Avoid the deep bunker on the left as favoring the right side as the terrain will feed your ball to the left.
Hole #11
P A R: 3
H A N D I C A P: 16/16
![]() 181
181
![]() 163
163
![]() 152
152
![]() 106
106
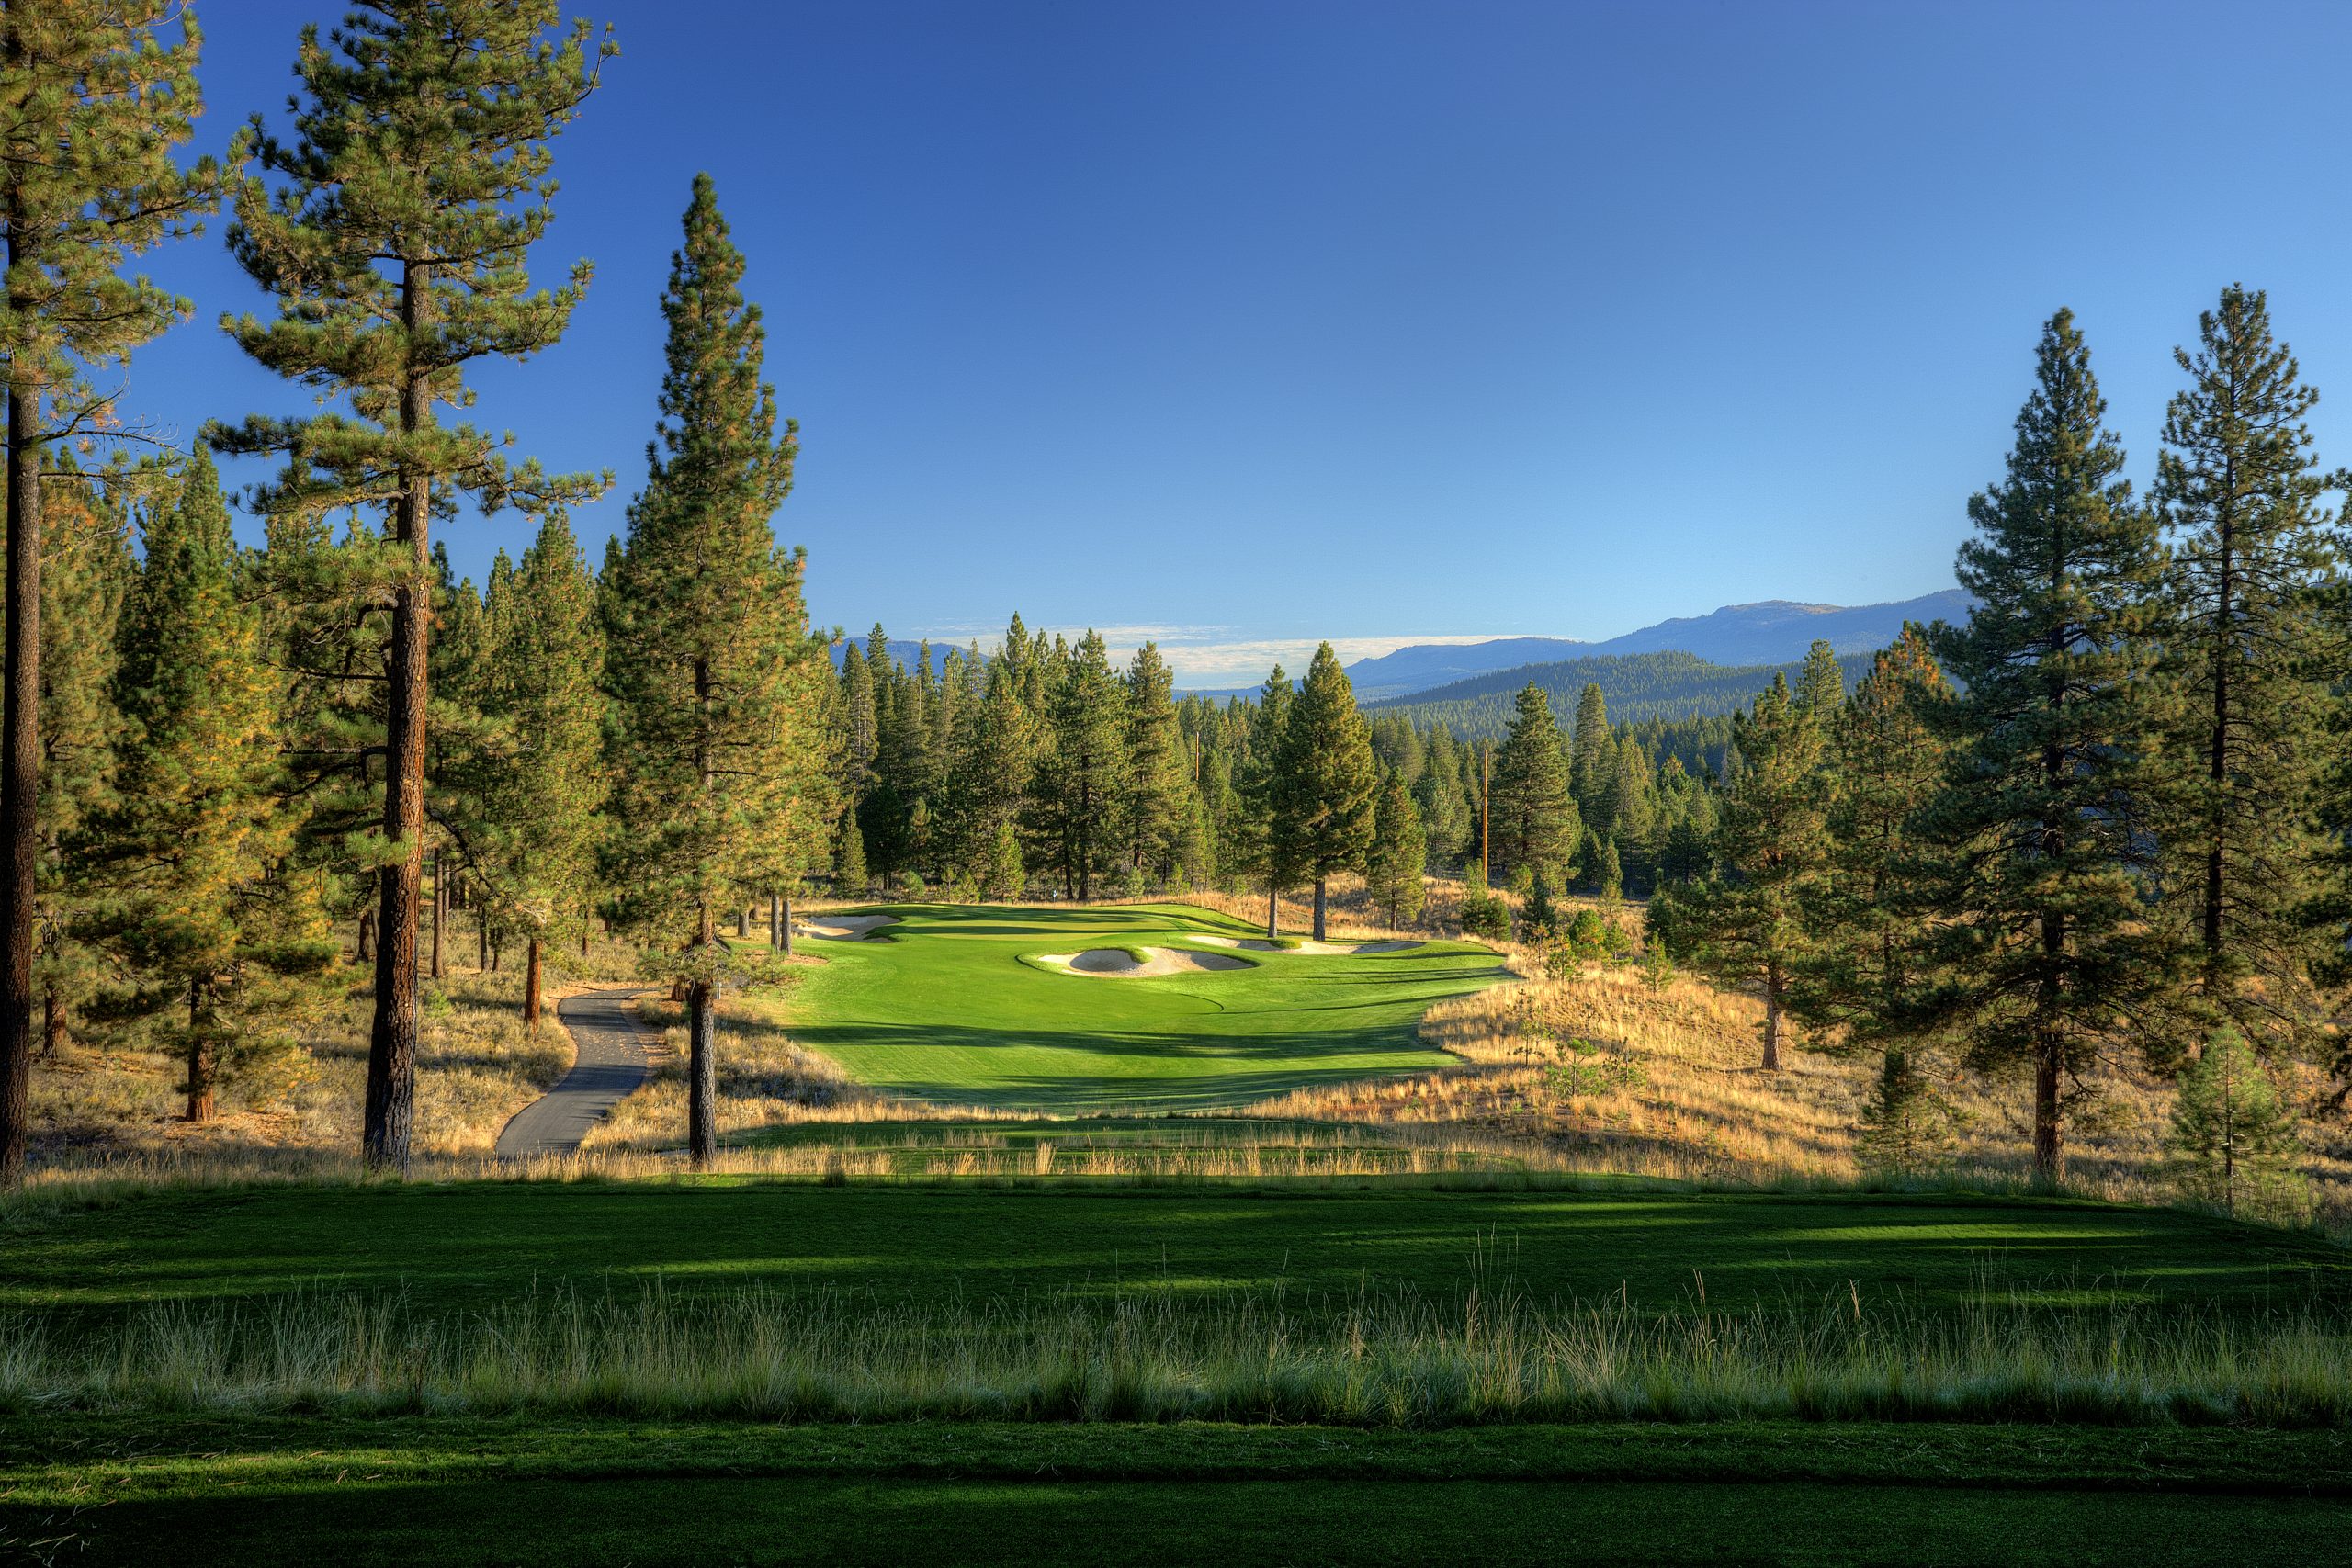
This traditional par four offers a generous landing area and the left side of the fairway will leave you with the best angle to a green that is guarded on both sides by deep bunkers.
Hole #12
P A R: 4
H A N D I C A P: 14/12
![]() 447
447
![]() 413
413
![]() 380
380
![]() 347
347
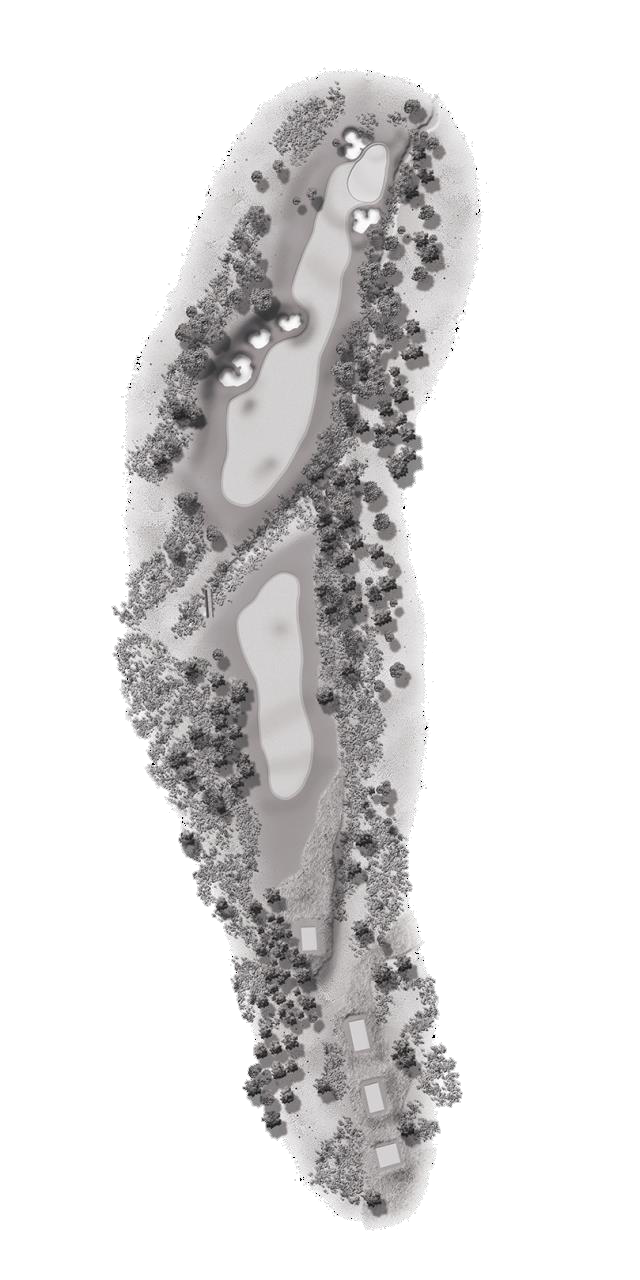
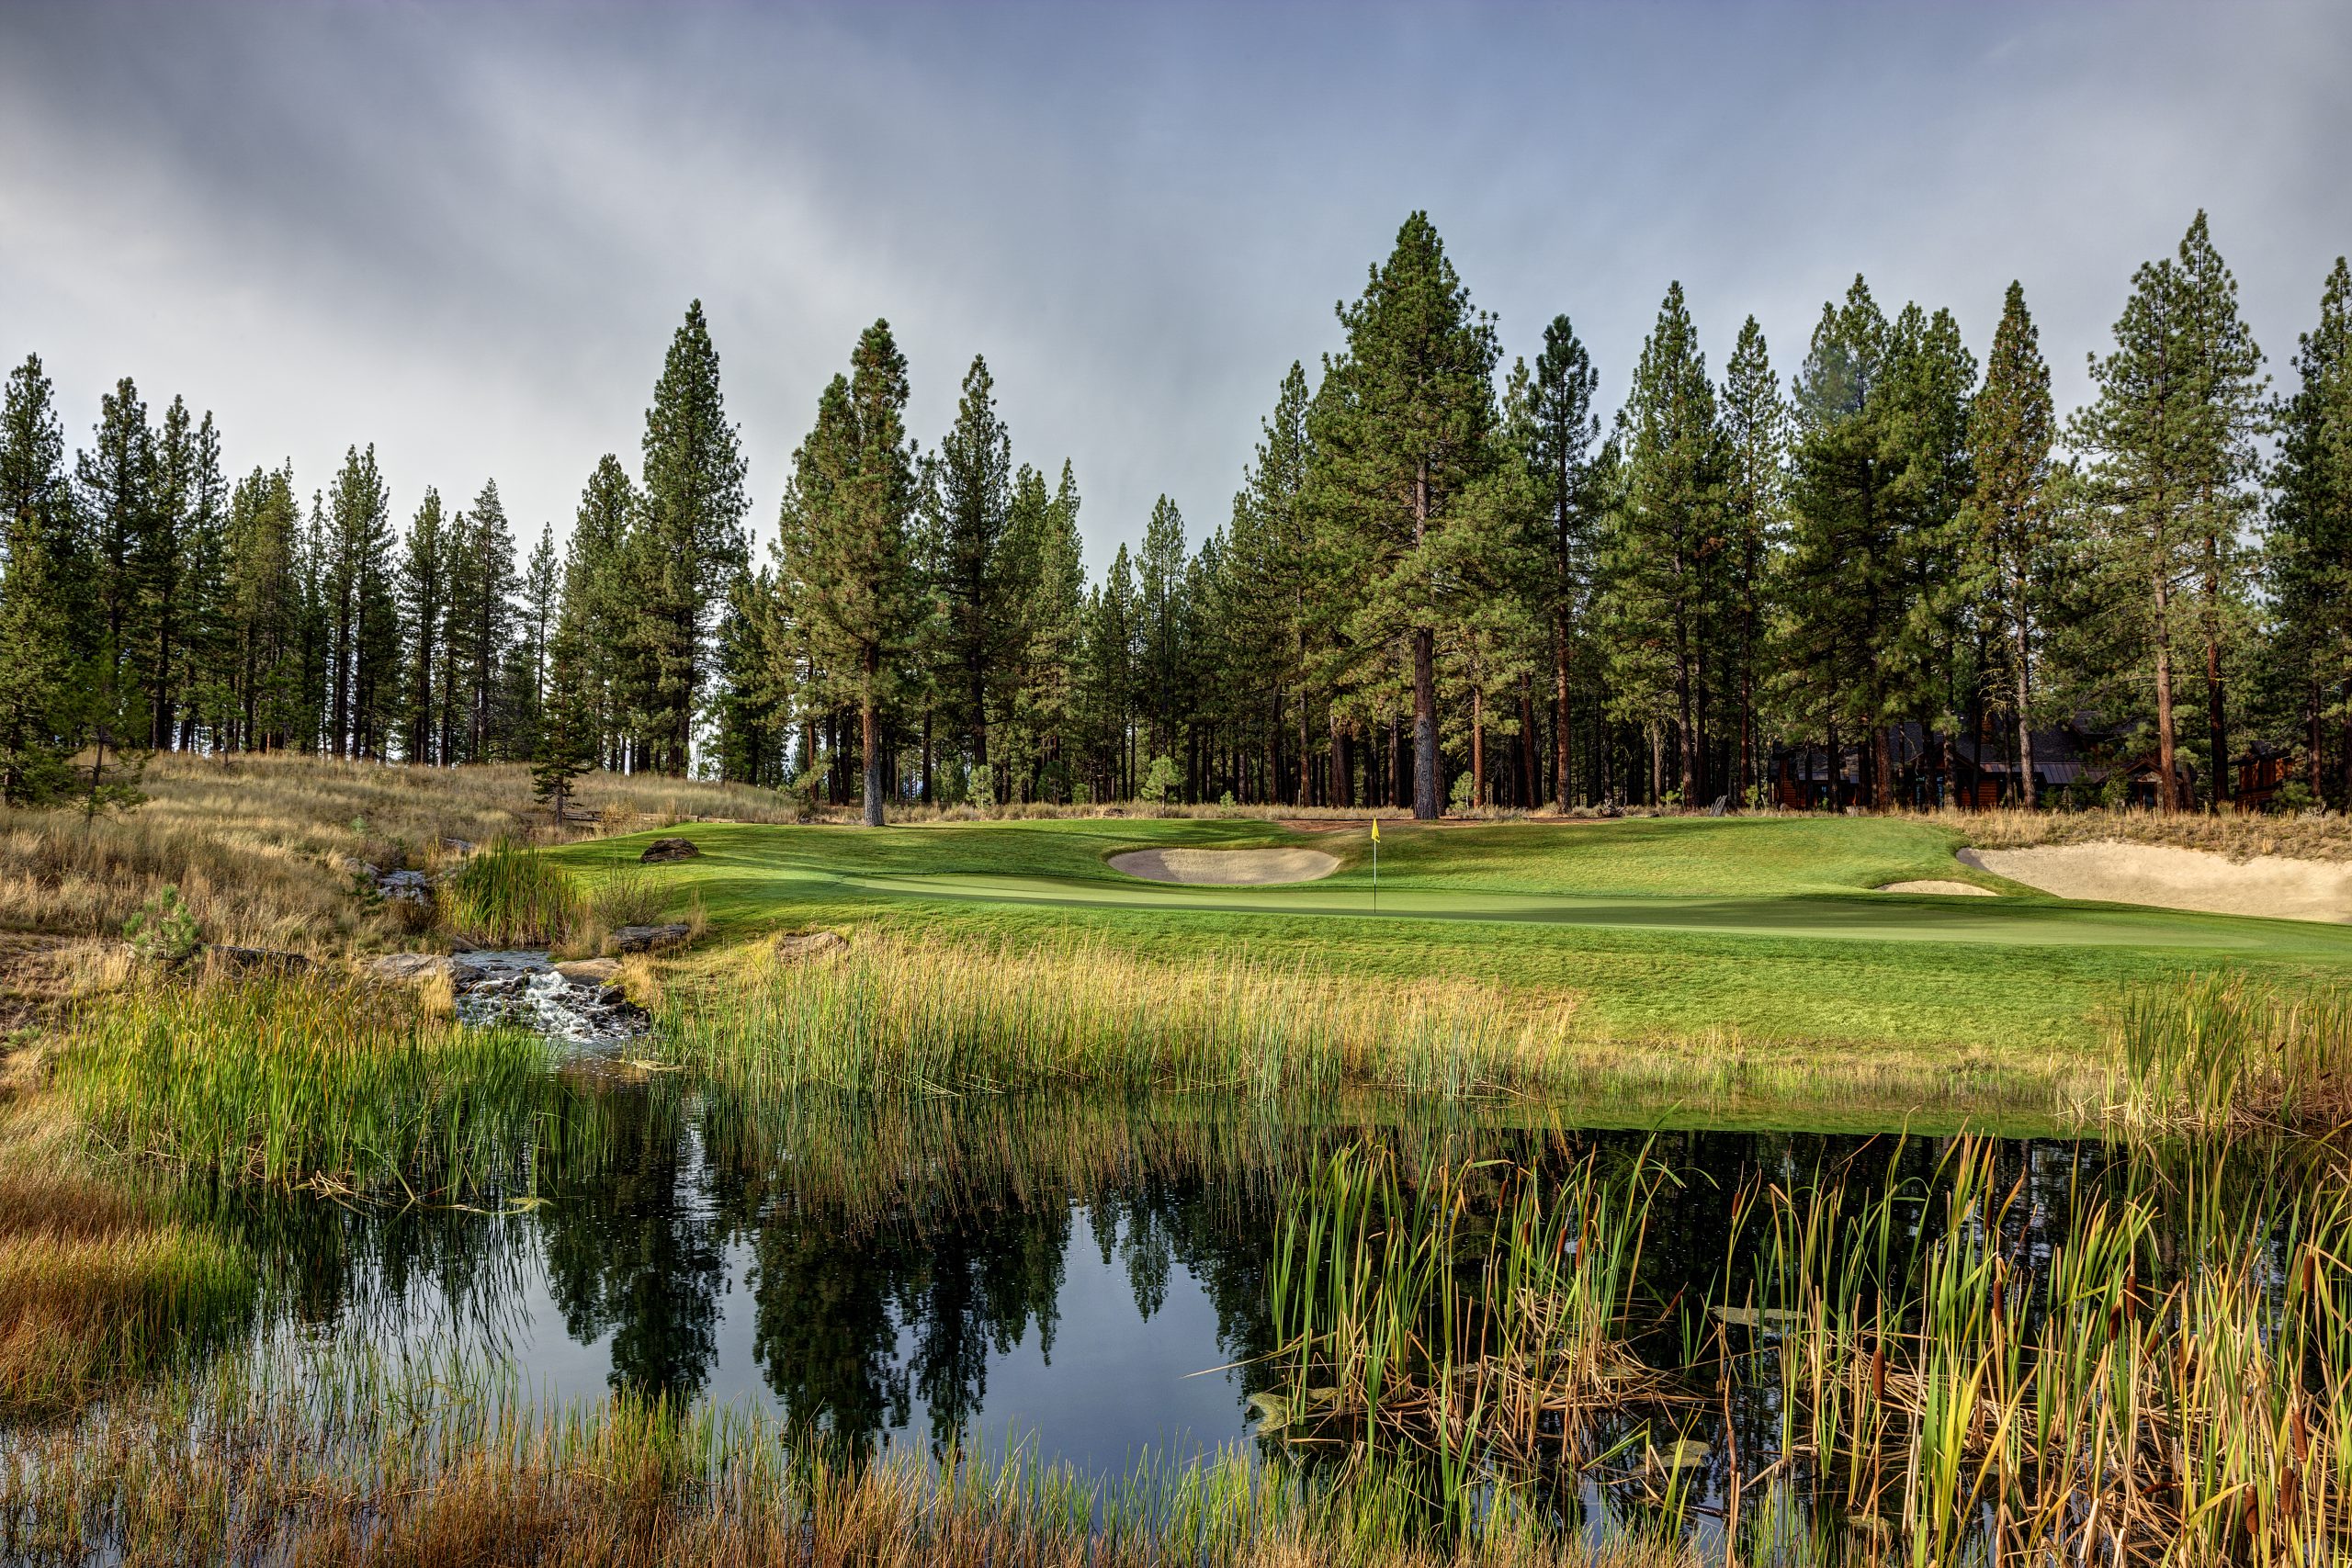
Normally into the prevailing winds, accuracy will be at a premium on this demanding par four that is protected by water from tee to green. A calculated approach to this well-guarded green is crucial.
Hole #13
P A R: 4
H A N D I C A P: 2/8
![]() 442
442
![]() 412
412
![]() 380
380
![]() 329
329
One of the shortest par fours may entice the longest of hitters to go for the small, well-guarded green off the tee. A more conservative well-played tee shot to the right of the fairway bunkers on the left will yield a wedge to this tricky green.
Hole #14
P A R: 4
H A N D I C A P: 18/18
![]() 367
367
![]() 334
334
![]() 302
302
![]() 260
260
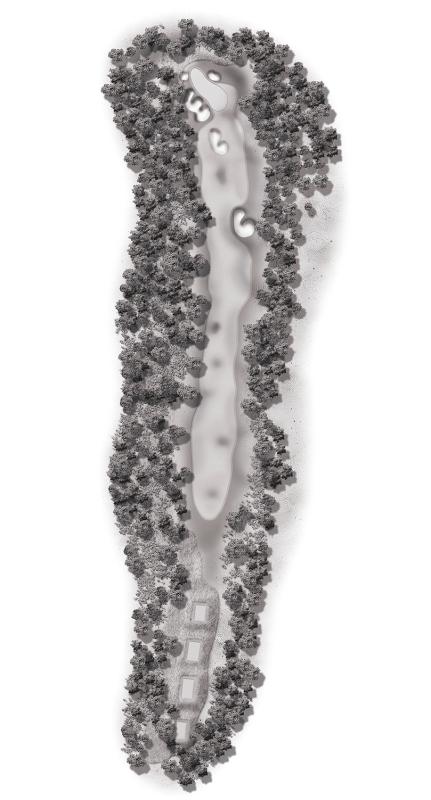
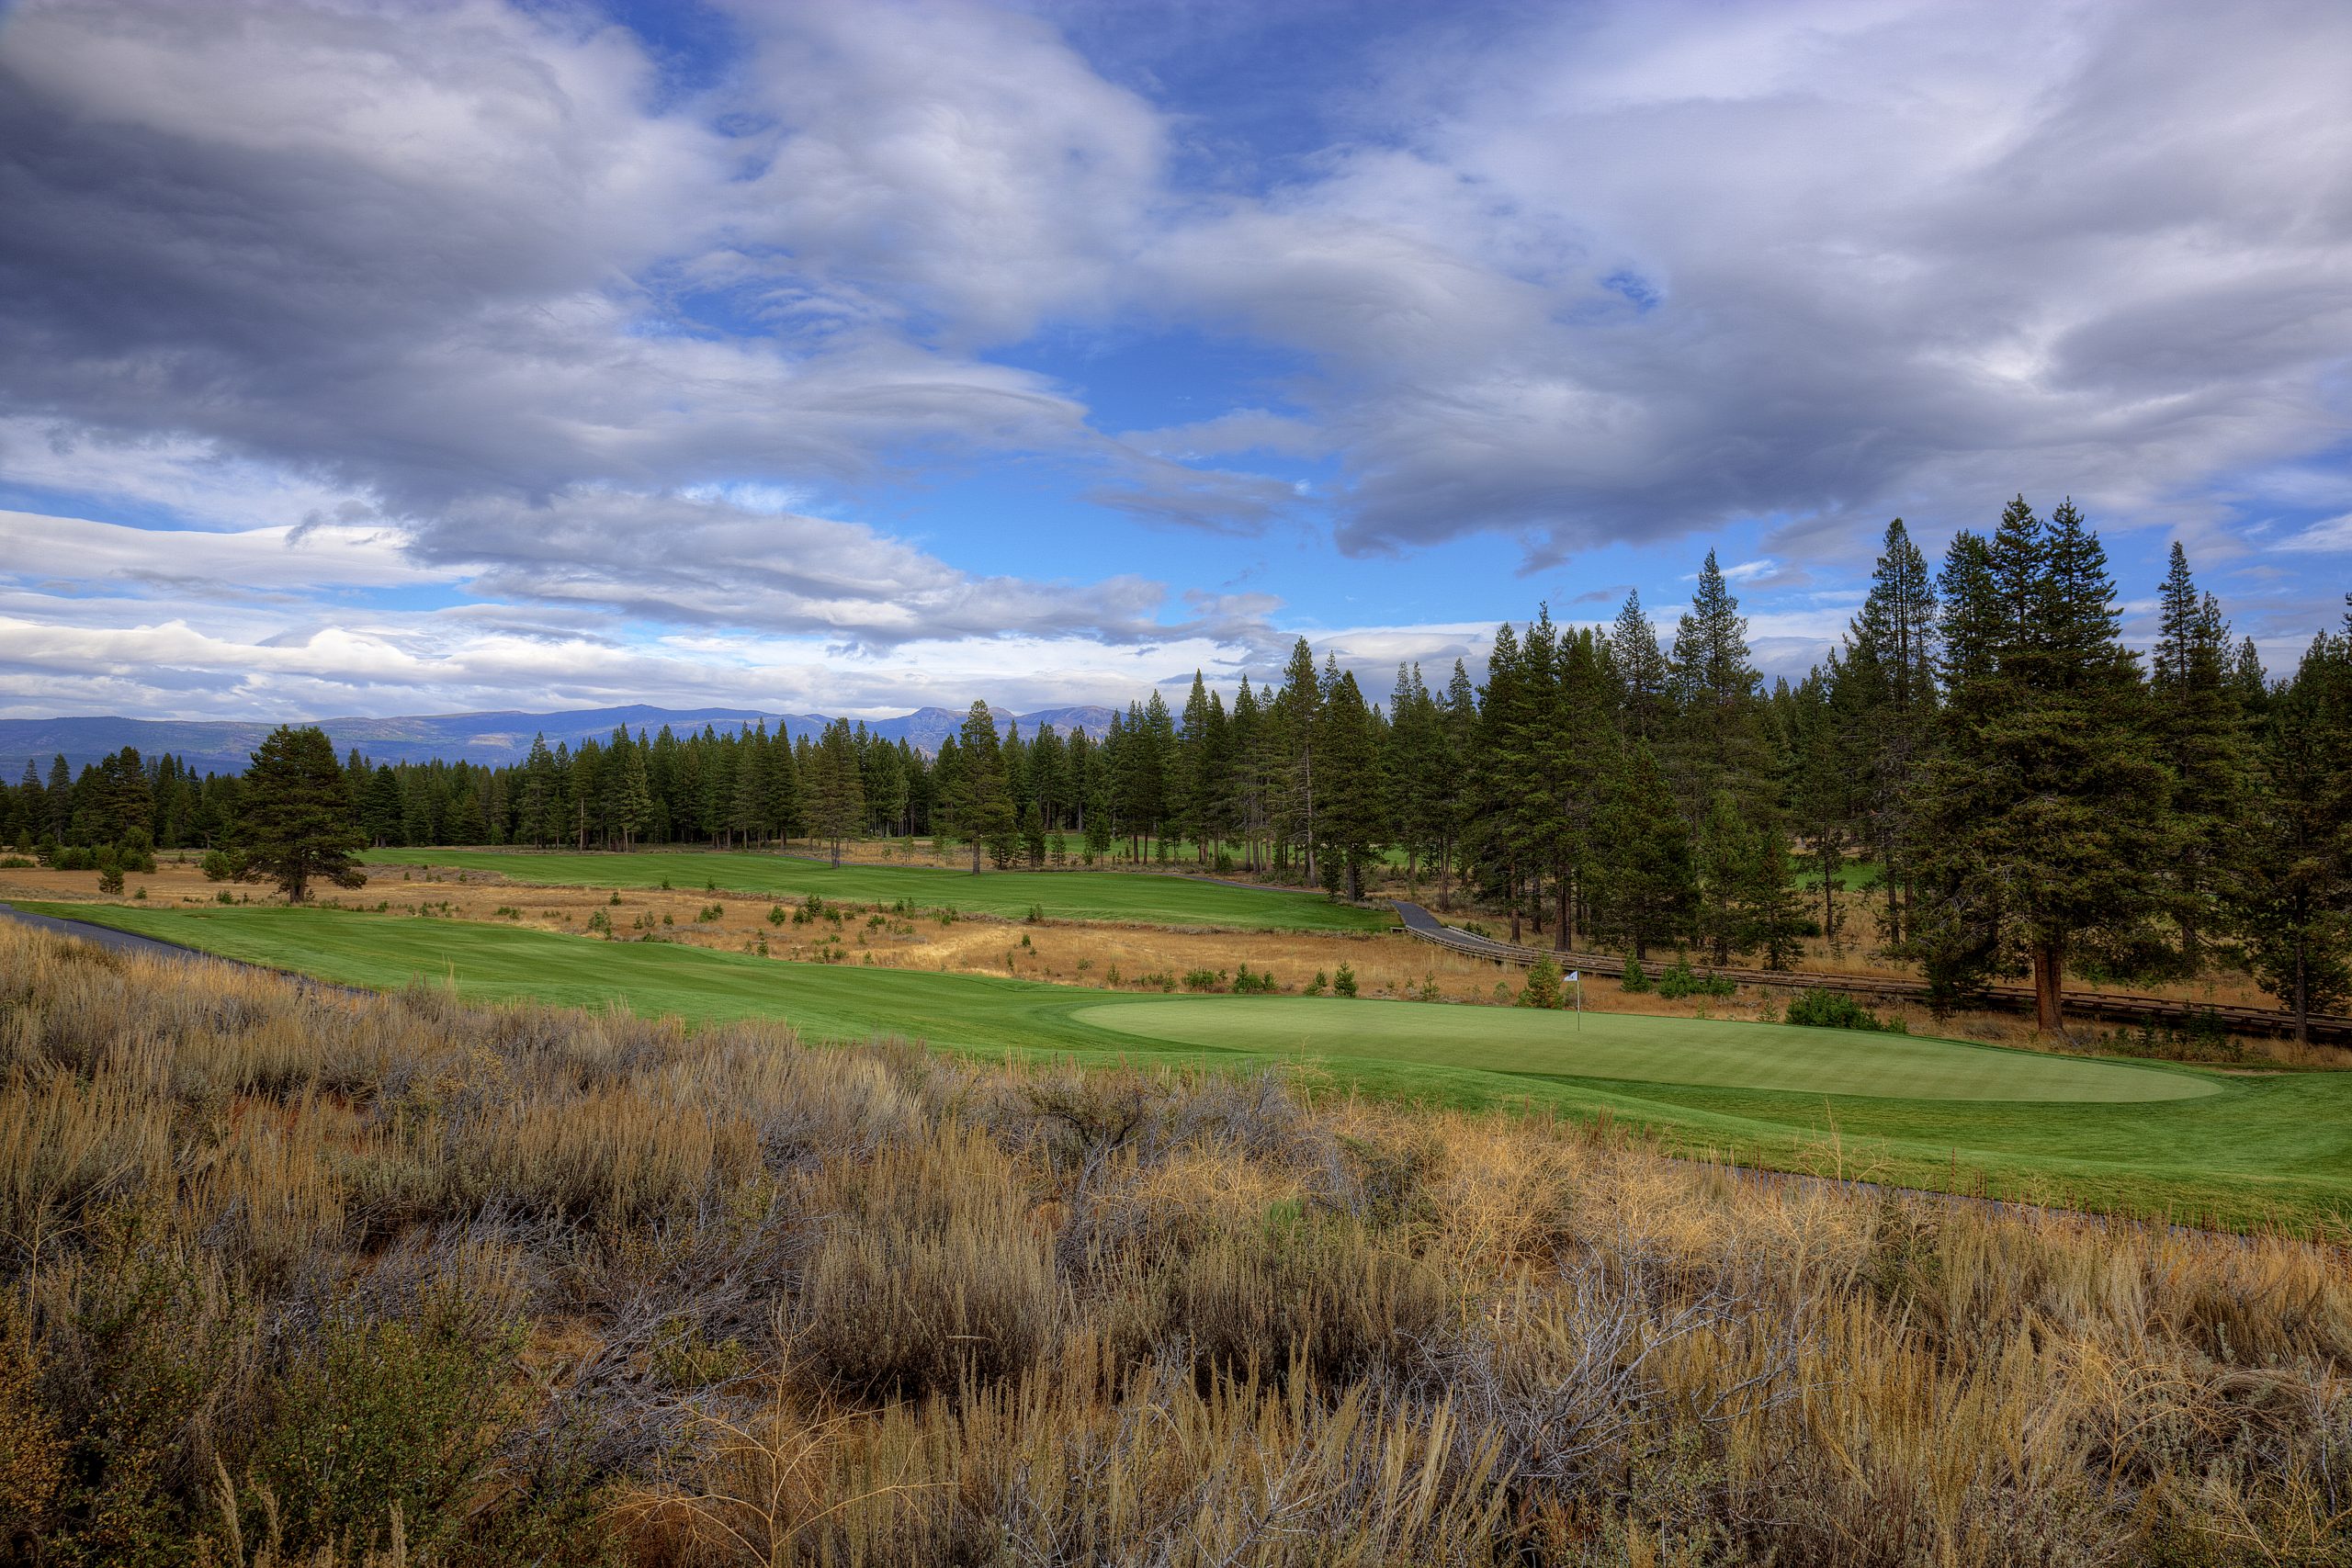
This reachable par five will yield birdies if you think your way through it. Favor the right side off the tee and on your second shot as the ball feeds right to left. Club selection is crucial on your third shot to this well-protected shallow green.
Hole #15
P A R: 5
H A N D I C A P: 10/10
![]() 561
561
![]() 525
525
![]() 491
491
![]() 458
458
Don’t be misled by the yardage, this downhill par three plays one to three clubs shorter. Choosing the right club is essential!
Hole #16
P A R: 3
H A N D I C A P: 6/6
![]() 242
242
![]() 222
222
![]() 194
194
![]() 149
149
With the prevailing wind at your back the longer hitter may drive through the fairway. A tee shot over the left edge of the fairway bunker will leave you with a mid iron to this fast and firm green that is hard to hold.
Hole #17
P A R: 4
H A N D I C A P: 12/4
![]() 431
431
![]() 425
425
![]() 395
395
![]() 314
314
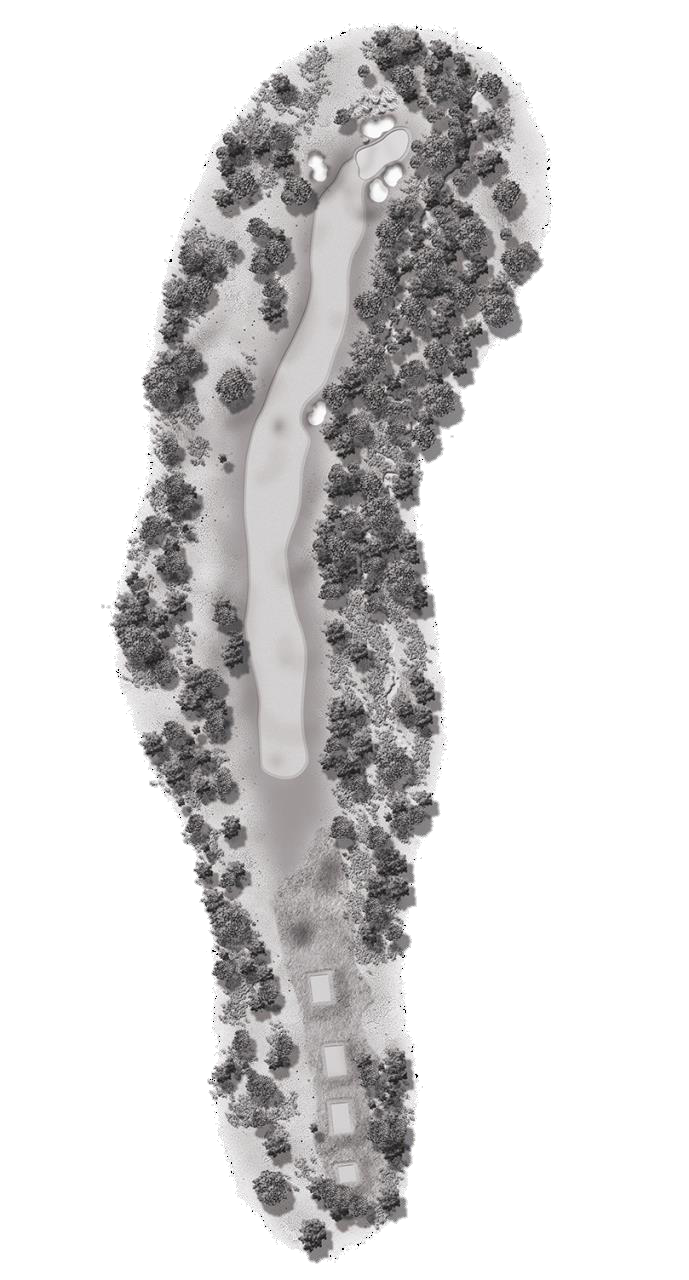
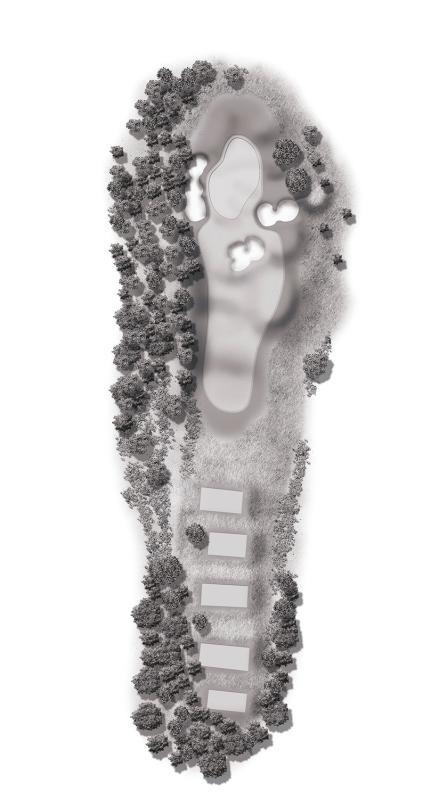
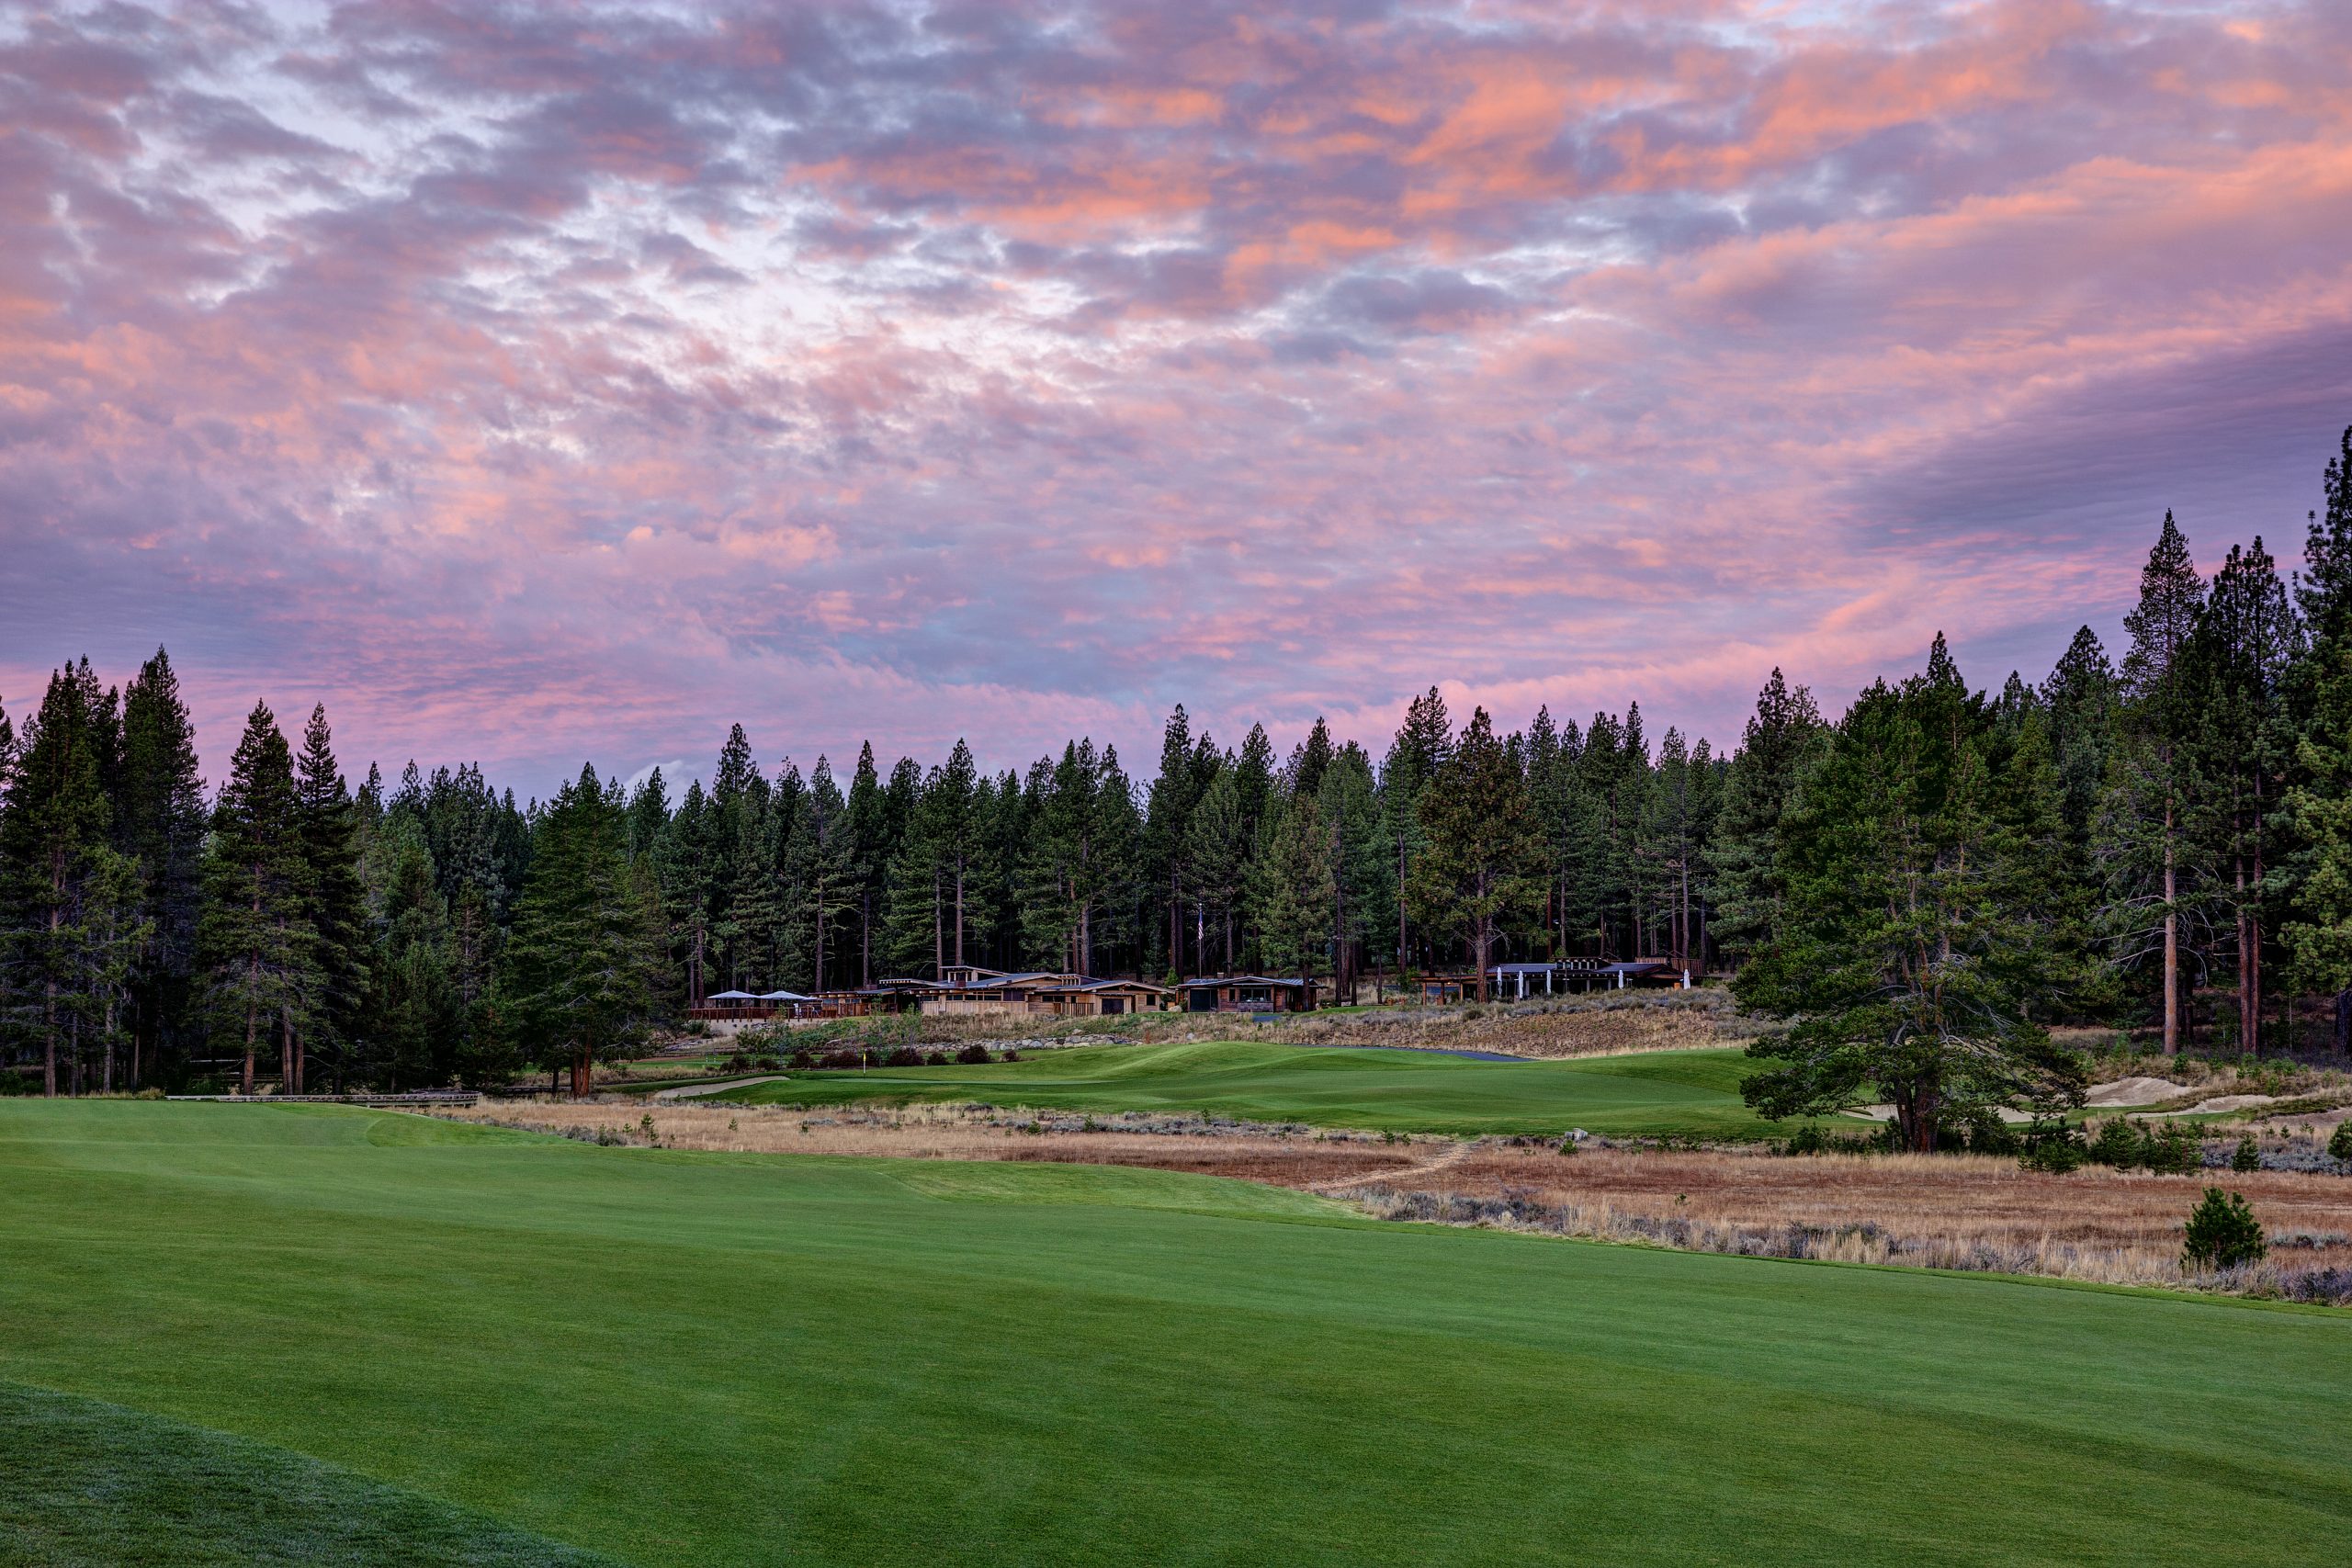
Normally into the prevailing wind, this long par five is a three shot hole for most players. A long tee shot down the right-center of the fairway is a great start. The second shot is best played down the left fairway avoiding the hazard on the right. Longer hitters can go across to the right fairway on the second shot leaving a good angle and chance for birdie at the closing hole.
Hole #18
P A R: 5
H A N D I C A P: 4/2
![]() 613
613
![]() 589
589
![]() 506
506
![]() 414
414
Gray's Crossing Handicap Conversion Charts
Click your Tees below to View
Gray's Crossing Scorecard
| HOLE | PAR | BLACK | BLUE |
BLUE/ WHITE |
WHITE | RED | MEN’S HCP |
LADIES’ HCP |
| 1 | 4 | 444 | 410 | 375 | 375 | 288 | 13 | 11 |
| 2 | 4 | 380 | 348 | 348 | 307 | 272 | 11 | 13 |
| 3 | 5 | 641 | 604 | 563 | 563 | 452 | 7 | 5 |
| 4 | 3 | 164 | 156 | 156 | 138 | 87 | 15 | 15 |
| 5 | 4 | 492 | 457 | 381 | 381 | 351 | 3 | 3 |
| 6 | 4 | 304 | 274 | 274 | 242 | 206 | 17 | 17 |
| 7 | 5 | 624 | 591 | 514 | 514 | 452 | 5 | 7 |
| 8 | 3 | 185 | 178 | 178 | 158 | 127 | 9 | 9 |
| 9 | 4 | 474 | 444 | 406 | 406 | 339 | 1 | 1 |
| OUT | 36 | 3,708 | 3,462 | 3,347 | 3,167 | 2,651 | – |
– |
| 10 | 4 | 474 | 455 | 372 | 372 | 321 | 8 | 14 |
| 11 | 3 | 181 | 163 | 152 | 152 | 106 | 16 | 16 |
| 12 | 4 | 447 | 413 | 413 | 347 | 310 | 14 | 12 |
| 13 | 4 | 442 | 412 | 412 | 380 | 267 | 2 | 8 |
| 14 | 4 | 367 | 334 | 334 | 302 | 260 | 18 | 18 |
| 15 | 5 | 561 | 525 | 525 | 491 | 417 | 10 | 10 |
| 16 | 3 | 242 | 222 | 194 | 194 | 149 | 12 | 6 |
| 17 | 4 | 431 | 425 | 354 | 354 | 314 | 6 | 4 |
| 18 | 5 | 613 | 589 | 475 | 475 | 414 | 4 | 2 |
| IN | 36 |
3,758 | 3,538 | 3,231 | 3,067 | 2,558 | – | – |
| TOTAL | 72 | 7,466 | 7,000 | 6,426 | 6,151 | 5,132 | – |
– |


![16GC11-m0281Hc[1]](https://www.tahoemountainclub.com/wp-content/uploads/2021/07/16GC11-m0281Hc1-scaled-600x400.jpg "16GC11-m0281Hc[1]")
![18GC11-m0106Hc[1]](https://www.tahoemountainclub.com/wp-content/uploads/2021/07/18GC11-m0106Hc1-scaled-600x400.jpg "18GC11-m0106Hc[1]")

